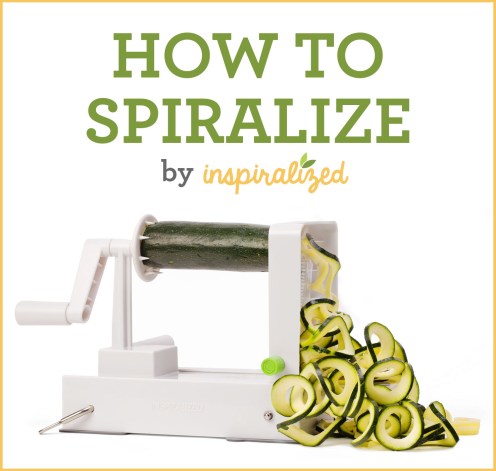
This is the first post of our brand new PIY –> DIY series where I find the most popular pins on Pinterest and put them to the test to tell you if they are worth your time & money. Today we will be testing this pin about how to use a spiralizer:

via Inspiralized
I was originally introduced to spiralizing by Ali of Inspiralized. If you are not familiar, you should definitely check out her blog! She is adorable and inspiring: she lost 25 lbs with the help of her spiralizer, so her blog name is perfect. Ali makes the most amazing pasta recipes, but she swaps out the pasta for spiralized veggies. As a major veggie lover and someone who generally eats fairly low carb, I had to try it!
Check out this mouth-watering recipe from Ali’s Instagram and many more on the Inspiralized blog.
Note: post contains affiliate links
What is a spiralizer?
Spiralizers are these funky pieces of equipment that kind of look like an apple peeler mixed with a medieval torture device. I bought the Paderno Spiralizer, which at the time was also Ali’s favorite. But, she now sells her own version that she developed based on her many many hours of using them. Check out her shop where you can buy her spiralizer along with her cookbooks and more! She even offers a free Spiralizing Starter Guide.
What kinds of veggies can you spiralize?
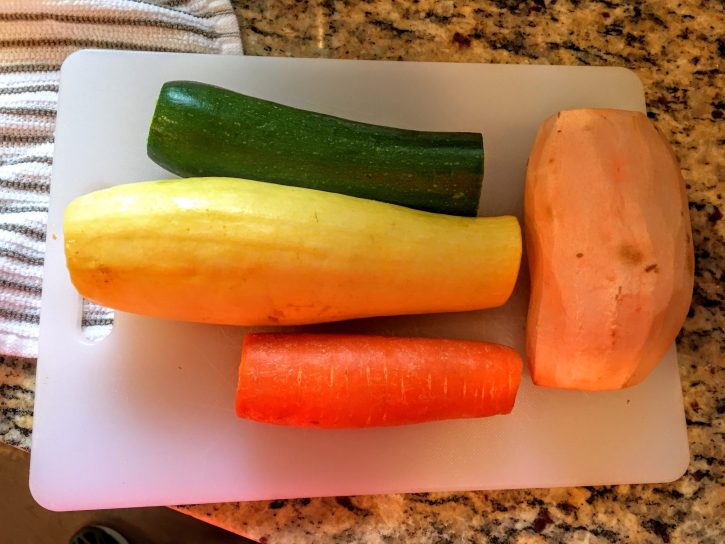
More than I even realized! I had originally just seen recipes with spiralized zucchini as the pasta swap, but in looking through her blog and Instagram, you will be in awe of the number of vegetables and fruit that she incorporates into her spiralized recipes! So, I decided the test out four veggies that would be the best as a pasta swap since that is my favorite way to use the spiralizer: zucchini, yellow squash, sweet potatoes, and carrots.
How do you spiralize?
Ali has a ton of resources on her site, including videos like the one below. I watched her videos on the four types of veggies and read her cooking recommendations and then went to try it out!
My spiralizer is set up below with its three blades for the different types of noodles. The first blade (from the left) creates the classic spaghetti-like noodles, the second creates a bit thicker (almost like linguine), and the final blade creates curly fettucine-type noodles. Make sure you press down firmly on each of the four corners to ensure that the suction cups are stuck firmly to the counter so that the spiralizer won’t move. When you need to release the suction cups, simply pull up on the little tabs on them and they easily come up without any tugging.

After washing, prepare your veggies by slicing off the ends so they are flat and peeling the carrot or sweet potato if desired. Do not peel the zucchini or yellow squash according to Ali or it will get mushy. Now when you are picking out your veggies, try to pick the ones with the biggest diameter or thickest. This makes it much easier to get spirals that flow together like pasta instead of constantly breaking apart.

Since carrots tend to be long and skinny, I was a bit skeptical about whether they would work. Also, the grocery store only had skinny zucchini to choose from, but I figured it would be a good experiment to see how they worked.
Now, to place your veggie of choice on the spiralizer, stick one end into the spikes on the right and then the other end gets pushed into the round metal piece on the left. Try to make sure the round metal piece is inserted as close to the middle of the veggie as possible.

Now it’s time to spiralize! I like to set up a clean plate or container and a clean dish towel because it can be a bit messy. With your left hand, grab the handle to the left and grab the crank (not sure what the technical term is) with your right hand. You are going to push in towards the blade with the handle in your left hand while winding the crank in a circle to spiralize (check out Ali’s video above to get the idea). Don’t be afraid to apply a fair amount of pressure when pushing the item towards to blade to spiralize.

Generally, this goes pretty smoothly, but there were two common issues I ran into:
- The zucchini peel got stuck in the blade and messed up the noodles coming out. If this happens, I use a wood skewer and dislodge anything stuck in there and start again like this:

- If your veggie item is a bit crooked, you may have to stop spiralizing if it starts to get off center. Simply re-insert the metal circle back into the veggie more towards the middle and start again.

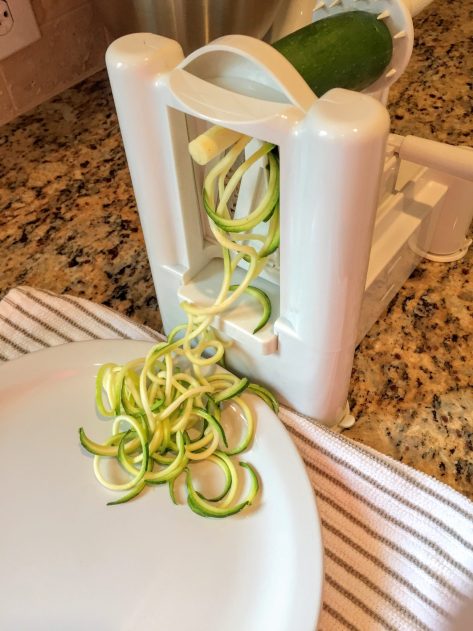
Despite my worry that the zucchini would be too skinny to spiralize, overall it worked just fine! Although, you do get more of the half-moon type fragments you can see on the edges of the plate above. This was using the first (spaghetti-type) blade. One veggie down, three more to spiralize! Next up is the yellow squash that I spiralized with the third (fettuccine-type blade):

Then, the carrot, and last but not least, the sweet potato (with the second blade type).

Here they all are spiralized (carrot is the top left). This step was a success and quite easy (I am not a great cook by any stretch of the imagination)!

How do you cook your spiralized veggie noodles?
Now I considered whether to try each of them out as part of a recipe, but I decided to focus on the basics of how to cook them as a pasta swap since it is the most versatile that can be subbed into any meal. Ali’s favorite method for cooking her spiralized veggie noodles is sautéing them in a skillet with non-stick spray or olive oil.
Here are the cook times that Ali from Inspiralized recommends over med-high heat: (click the links for more details)
- Zucchini & yellow squash: 2-3 minutes
- Carrots: 3-4 minutes
- Sweet potato: 6-8 minutes
Ali says to make sure your veggies don’t go limp and go for more of an al dente veggie pasta and encourages you to, “Embrace the crunch.”


So, I sprayed olive oil in a nonstick pan and cooked all the veggies based on the recommended times. Zucchini and yellow squash were about 2.5 minutes. Carrots were about 3 minutes and sweet potato about 6 minutes. Cook times seemed to vary a bit based on the portion size so keep that in mind.

Then, I added some spaghetti sauce to complete the pasta swap. Now, time to taste test!

Taste test results: Zucchini was my favorite, followed by the sweet potato. However, they all had that al dente crunch to them that Ali encouraged, but just didn’t quite work for me. In my mind, I wanted them to be softer like pasta, so I went back to the drawing board and tried two fixes with the zucchini noodles:
- Cook in the skillet for an extra 2-3 minutes (total of 5-6 minutes)
- Cook in the microwave from raw for about 2 minutes (timing will vary based on portion size). Here’s a picture of the version cooked in the microwave:

How did they taste? Personally, I strongly prefer the softer version and finished the whole plate! Admittedly, they did not look as pretty, but for me, taste is the priority. The microwave method was the easiest and took less time, but just make sure to drain any excess water when they come out. If you try to avoid the microwave, try cooking for longer and see which you prefer!
Total time breakdown: <30 minutes if just doing a single batch of one type of veggie noodles
- 15-20 minutes to prepare, spiralize and cook.
- ~5 minutes cleanup: scrub blades a bit to get rid of any stuck pieces then stick the entire spiralizer and blades in the dishwasher.
Total cost breakdown (veggie prices vary by season):
- Zucchini or yellow squash: $1.99/lb but can be about half that in the summer
- Sweet potato: $0.99/lb
- Carrots: $0.89 per bag
- Ragu spaghetti sauce ($1.99/jar)
- Spiralizer: $45 (one time investment)
- If you are eating as a meal, you will likely want to add a protein like ground turkey to the sauce ($3.29/lb).
Final verdict:
- Difficulty level: Easy
- Budget: $ (except one time investment for spiralizer $$)
- Spiralized veggies look gourmet and colorful – much better than dull white pasta.
- This pasta swap will save you about 200 calories per cup compared to regular noodles.
- Zucchini noodles (or zoodles) were my favorite since they taste good and are a lower cal option compared to sweet potato noodles.
- I did not like the al dente crunch of the noodles based on the recommended cook times and preferred to cook them until softer even if they didn’t look quite as good. This mimicked the experience of eating pasta much more in my opinion.
- The microwave is the most convenient and fastest cooking method but sautéing also works.
- I would definitely make them again. Consider me inspiralized 😉
PIY to DIY mission accomplished! For this or any of our PIY –> DIY posts, please send pictures if you try them and let us know what you thought! Please subscribe below to find out when the next project is posted and connect with me on Pinterest. See y’all next time!
